Follow this step-by-step guide to get your EURUSD, GBPUSD, or XAUUSD (Gold) Expert Advisor up and running correctly on a VPS with MetaTrader 4.
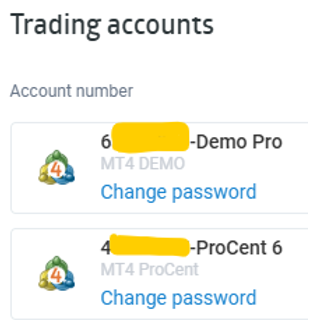
Once you have signed up with one of our partner brokers, please email your MT4 trading account number and broker name to info@nexusforextrading.com. We will then send your EA files with the licence key coded specifically to that account. The licence is limited to one broker account per purchase and will not work on any other account.
Set up a Virtual Private Server to keep MT4 running 24 hours a day
A VPS is a remote Windows computer that stays online around the clock. It keeps your MT4 platform and EA running even when your own computer is switched off. This is essential for uninterrupted automated trading.
Recommended VPS: ChocoPing Cheapy VPS #3 — 3GB. This plan is Forex-focused, great value for 1 to 3 MT4 terminals, and offers low-latency locations. Choose New York or London for the best connection to most FX brokers.
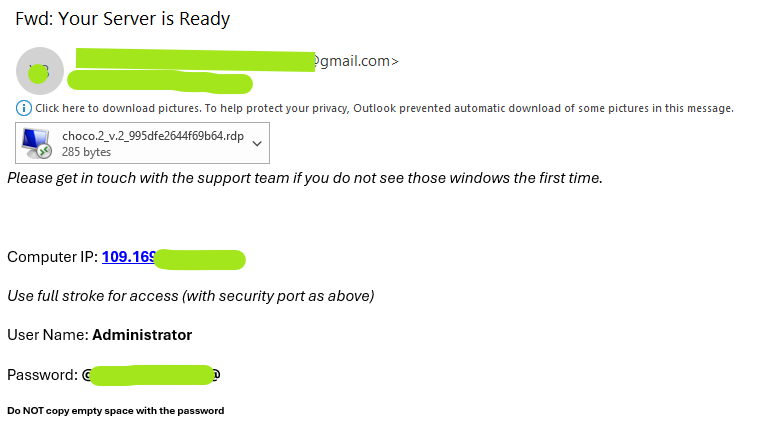
You do not install a VPS like regular software — you connect to it. When connected, you will see the VPS Windows desktop and can work on it as if it were in front of you.
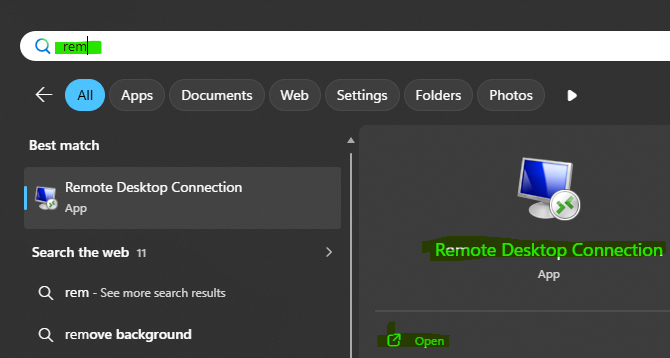
To open Remote Desktop on Windows:
Required for EA licence activation — must use our partner referral link
To activate your EA licence, you must register through one of our partner brokers using our referral link. Click here to find which brokers are available in your country.
The signup and MT4 installation process is identical for all of our partner brokers, and applies the same way whether you're trading EURUSD, GBPUSD, or XAUUSD (Gold). We use RoboForex as the example below.
Install the trading platform on your VPS and log in to your account
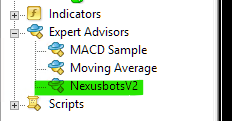
Install the Nexus EA and attach it to the correct chart for your pair
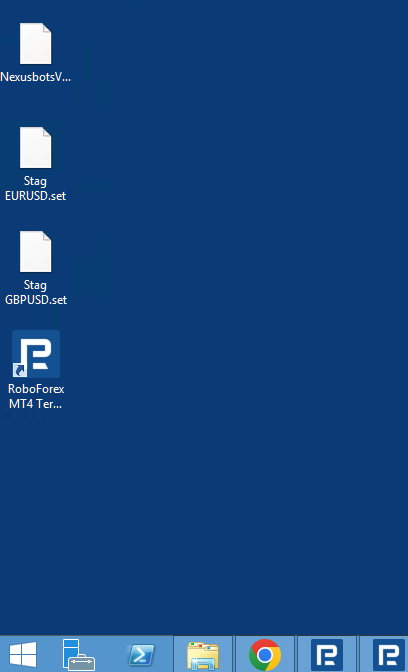
Once you receive your EA files from us by email, copy them to your VPS desktop so they're easy to access during the steps below. The same EA file, NexusBotsV2.ex4, is used for EURUSD, GBPUSD and XAUUSD — the chart, timeframe, and preset file you load is what determines which strategy runs.
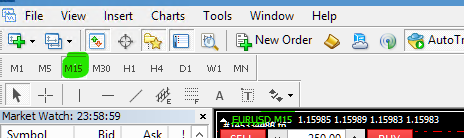
The Nexus EA must be run on the correct currency pair (or Gold) and the correct chart timeframe. Running it on the wrong timeframe will negatively affect its performance.
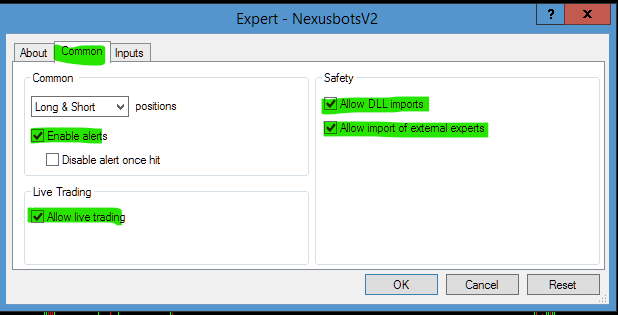
Start with the Common tab and make sure both of the following boxes are ticked:
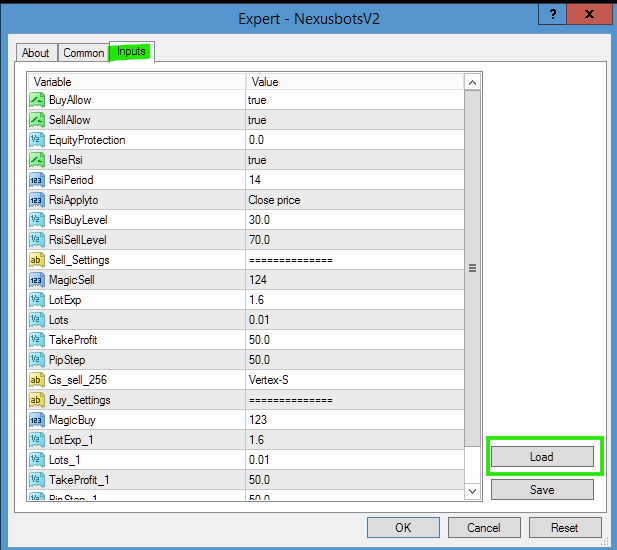
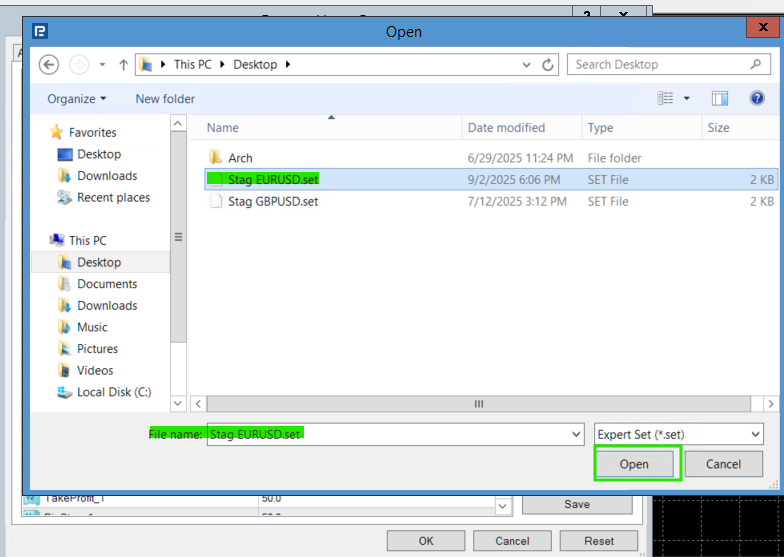
Navigate to your VPS desktop and select the correct preset file for your pair:
The Strength For Gold preset uses an additional RSI-based filter that is not present in the EURUSD or GBPUSD strategies. After loading Strength For Gold.set, scroll through the Inputs tab and confirm this setting:
This input does not apply to EURUSD or GBPUSD — leave their presets as loaded, no changes needed there.
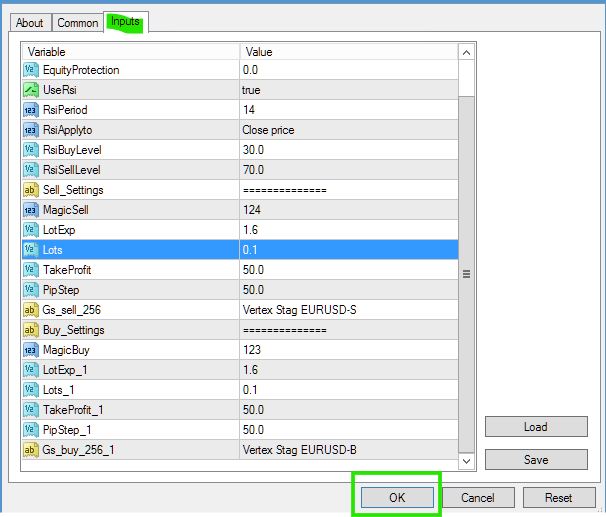
Still in the Inputs tab, locate the lot size field. Set a conservative starting value for whichever pair you're running — start low and increase only as you build confidence in the EA's live performance.

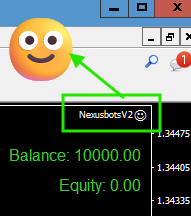
Once set, click OK to close the settings window and activate the EA.
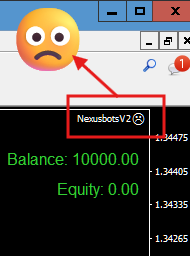
If a sad face appears in the top-right corner of your chart after clicking OK, AutoTrading is disabled.
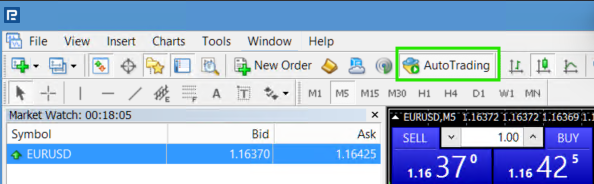
Click the AutoTrading button in the top MT4 toolbar — it will turn green when active.

| Account Type | Balance | Starting Lot Size |
|---|---|---|
| Cent Account | $1,000 | 0.1 Lot |
| Cent Account | $2,000 | 0.2 Lots |
| Non-Cent Account | $50,000 | 0.01 Lot |
Use the free RoboForex Lot Size Calculator to work out the right lot size based on your exact account balance and margin available.
Work through these one by one if the EA is not opening trades